Friday, June 7, 2013

Beautiful face & fresh (9 ways to avoid wrinkles)

Beautiful face & fresh (9 ways to avoid wrinkles)


FACE is fresh and healthy is every woman's dream. Hence it is very important to take care of facial skin so taut, shiny and free of wrinkles. Well if you want to avoid problems such as dull skin and wrinkles, here are simple steps that can be practiced in everyday activities. Have a naturally beautiful face with the following tips:

1. Sleeping with the supine position on your back.
The American Academy of Dermatology (AAD) recommends that sleeping in certain positions during the night can cause "sleep lines". Wrinkles that occur on the surface of the skin becomes harvesters and will not disappear when you get up. Sleeping on your side can cause wrinkles on the cheeks and chin, while sleeping facedown gives a frown. To avoid the formation of wrinkles, the AAD recommends to sleep on their backs on your back.

2. Many eat fish, especially salmon.
Fish is one of the best sources of protein. The salmon fishing is one of the highly recommended as beneficial to the growth of skin cells. Salmon also known as an important source of essential fatty acids known as omega-3. The dermatologist said that essential fatty acids are essential nutrients that keep skin young, shiny, and reduce wrinkles.

3. Do not squint.
AAD indicate that repetitive or repetitive facial movement - like squinting - overworks facial muscles, forming a groove that appears below the skin surface. Flow is too long will turn into wrinkles. Keep making big eyes, use eye glasses if needed. Wearing glasses in addition to protecting the skin around the eyes from the sun today, it will also make you avoid the habit of squinting.

4. Use fruit acids (AHA).
Alpha hydroxy acids (AHA) is a natural acidic fruit can dimanfaatan lift the top layer of dead skin cells. AHA also reduces the appearance of fine lines and wrinkles, especially around the eyes. New evidence suggests that in higher concentrations, AHAs may help stimulate collagen production.

5. Replace coffee drink with cocoa or chocolate
In a study published in the Journal of Nutrition, 2006, the experts indicated the main ingredient maker cocoa or chocolate contains two types namely epicatchin flavonols and catechins. Antioxidants protect the skin from sun damage, improved circulation to skin cells, improves hydration and make the skin look and feel smoother.

6. Do not wash your face too often
According to skin experts from the University of Maryland Medical Center, tap water could erode the oil layer that protects the skin's natural moisturizers and ingredients that prevent the skin from wrinkles threat. Washing your face too often, and you natural protective layer. If your soap does not contain skin-protecting moisturizers, preferably a facial cleanser instead of soap.

7. Consumption of vitamin C.
Studies at Tulane University and at several other places suggests vitamin C can increase collagen production, protect against damage from UVA and UVB rays. Vitamin C also improves pigmentation problems, and inflammation of the skin. Nevertheless, not all types of vitamin C can provide benefits for the skin. In some recent research, many researchers recommend vitamin C with L-ascorbic acid form of potentially overcome the wrinkles.

8. Diligent eating soy
Research shows that soy may help protect against sun diakibat aging (photoaging). Research published in the European Journal of Nutrition, reported that soy-based supplement whose ingredients are vitamin, protein, fish, white tea extract, grape tomatoes and seeds, improve skin structure and strength after six months.

9. Apply basic skin care.
If you want to have skin that looks young and healthy, start with the basic steps in treatment such as the sun, wear sunscreen, do not smoke, use a skin moisturizer.

Sources: Health Benefits

Saturday, April 20, 2013

Beautiful Face: Best Homemade Face Packs for Summer Sandalwood magic

Beautiful Face: Best Homemade Face Packs for Summer Sandalwood magic

Best Homemade Face Packs for Summer Sandalwood magic


Beauty Tips: 20 Best Homemade Face Packs for Summer


Sandalwood has great soothing properties and it also helps to get rid of blemishes and tans.

Ingredients:

• Sandalwood powder

• Rose water

Method:

1. Take some Sandalwood powder and make a thin paste with rose water.

2. At bed time wash your faces with lukewarm water. Aapply this paste on face and leave for overnight. Wash in the morning with lukewarm water.

Beautiful Face: Best Homemade Face Packs for Summer Chocolate face pack 2013

Beautiful Face: Best Homemade Face Packs for Summer Chocolate face pack 2013

Best Homemade Face Packs for Summer Chocolate face pack 2013


Beauty Tips: 20 Best Homemade Face Packs for Summer
 

This delicious and tempting face pack can be a feast for your skin.

Ingredients:

• 2 tablespoons of dark chocolate or cocoa powder

• 5 tablespoon of honey

• 1 tablespoon of milk

Method:

1. Mix two tablespoons of dark chocolate or cocoa powder with five tablespoons of honey.

2. Add a tablespoon of milk to this mixture and mix well.

3. Apply on your face and leave it for ten minutes after which, you can feast it down your throat.

Beautiful Face: Best Homemade Face Packs for Summer

Beautiful Face: Best Homemade Face Packs for Summer

Best Homemade Face Packs for Summer


Beauty Tips: 20 Best Homemade Face Packs for Summer


If you are pimple prone during summers, then this pack is for you. This pack has anti-microbial properties which will help to curb pimples.

Ingredients:

• Gram flour/besan

• Honey

Method:

1. Mix gram flour and warm honey.

2. Apply this paste regularly to your face for 20 mins. Wash it off, thoroughly with cold water.

Beautiful Face: Best Homemade Face Packs for Summer

Beautiful Face: Best Homemade Face Packs for Summer

Best Homemade Face Packs for Summer

Beauty Tips: 20 Best Homemade Face Packs for Summer
Best Homemade Face Packs for Summer # 8: Banana facial mask

This easily accessible fruit can be of great aid, if you are a victim of dry skin during summers.

Ingredients:

• ½ banana

• 1 tablespoon honey

• 2 tablespoon sour cream

Method:

1. Mash 1/2 banana and add 1 tablespoon honey and 2 tablespoons sour cream.

2. Apply to face and let set for about 10 minutes. Gently wipe off with a damp wash cloth or wash it off with lukewarm water.

Related Article: Healthy Banana Recipes

Friday, April 19, 2013

Beautiful Face: Taeyeon mesmerizes with a close up of her beautiful face

Beautiful Face: Taeyeon mesmerizes with a close up of her beautiful face

Taeyeon mesmerizes with a close up of her beautiful face


Girls’ Generation‘s Taeyeon left her fans unable to tear their eyes away as she mesmerized with a close-up selca!
The idol wrote on her Instagram, “Up close♡”, while sharing the drop dead gorgeous photo of her smiling into the camera. Fans couldn’t help but have their hearts skip a beat upon seeing her beauty even closer up than usual.
So get ready to change your display pics and wallpapers because you won’t want to miss out on adding this to your collection of Taeyeon’s beautiful photos.

Sunday, April 14, 2013

Beautiful Face: Best Homemade Face Packs for Summer Soya beans or lentil pack

Beautiful Face: Best Homemade Face Packs for Summer Soya beans or lentil pack

Best Homemade Face Packs for Summer Soya beans or lentil pack

Beauty Tips: 20 Best Homemade Face Packs for Summer
Best Homemade Face Packs for Summer
  Soya beans or lentil pack

Soya beans are rich in isoflavone and applying this pack will help to slow down the process of ageing of the skin.

Ingredients:

• 50 grams soya beans or masoor dal

• Water

• Unboiled milk

• Almond oil

Method:


  1. Take fifty grams Soya beans (or masoor dal), soak it in water over-night.

  2. Grind it well next morning into as paste after removing the shells. 

  3. 3. Mix un boiled milk and almond oil in the paste and apply.

Beautiful Face: Homemade Face Packs for Summer

Beautiful Face: Homemade Face Packs for Summer

Homemade Face Packs for Summer


Summer has already knocked our doors and it means business. You step out of the house and you can literally feel the heat burning your skin. Besides dehydrating the body, the extreme temperature can cause havoc on the skin and can cause tanning, pigmentation, early ageing etc.  The result is dull, tried and sallow looking skin with zero appeal.


Yes, one can always go to the salon but let’s be honest, who has the time? But the lack of time should not refrain you from talking care of your skin and that’s why today we share a list of 20 best homemade face packs which are easy to make but equally effective in beating the summer rage on the skin


20 Best Homemade Face Packs for Summer

Beauty Tips: 20 Best Homemade Face Packs for Summer

Summer has already knocked our doors and it means business. You step out of the house and you can literally feel the heat burning your skin. Besides dehydrating the body, the extreme temperature can cause havoc on the skin and can cause tanning, pigmentation, early ageing etc.  The result is dull, tried and sallow looking skin with zero appeal.

Yes, one can always go to the salon but let’s be honest, who has the time? But the lack of time should not refrain you from talking care of your skin and that’s why today we share a list of 20 best homemade face packs which are easy to make but equally effective in beating the summer rage on the skin.


Beautiful Face: They cleanse gently, once a day

Beautiful Face: They cleanse gently, once a day

They cleanse gently, once a day

They cleanse gently, once a day.

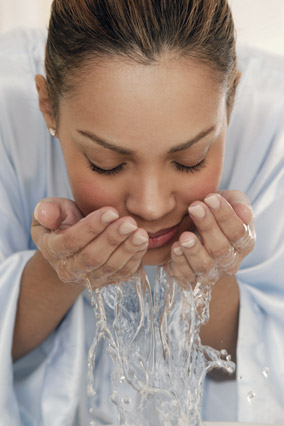
Unless you have oily skin, you only need to wash your face in the evening, with a creamy cleanser and lukewarm water. Give the cleanser time to work. "Instead of scrubbing your face, let the cleanser sit on your skin for several seconds and break down the makeup, dirt, and oil," says Boston dermatologist Ranella Hirsch, MD. In the morning, simply splash your face with lukewarm water. (If you're oily, use a gentle foaming cleanser morning and evening.
Face wash
 

Friday, April 5, 2013

Beautiful Face: Here is the step by step tutorial to blow dry your hair

Beautiful Face: Here is the step by step tutorial to blow dry your hair

Here is the step by step tutorial to blow dry your hair

Most of you would have tried using a Blow dryer before. You will need it the especially in winters, when the wind and wet hair combination can leave you sick with cold or headaches.
Blow drying follows a rigorous process to avoid hair damage. Lack of proper information on the techniques can leave you with dull, over dried and frizzy hair, which also could carry static, making it more prone to breakage.
So today we will show you how you can perfectly blow dry your hair, and also create some added bounce when you have that extra little time in your hands.

Here is the step by step tutorial to blow dry your hair:

Step 1:

Shampoo your hair well such that no residue is left behind. Residue of shampoo or unwashed shampoo weighs down hair, thus risking hair fall and scalp irritations. After wash pat dry with a towel. It is never advisable to dry your hair using towel aggressively.
Blow Dry Hair 1

Step 2:

It is always best to buy a blow dryer which has at least 3 heat settings viz. Low, Medium and High; and 3 Wind pressure settings.
You can bank on brands like Philips, Panasonic and Remington. It’s an investment of a life time if you’re lucky enough and it doesn’t accidentally get damaged. So spending a few extra bucks is better than going for one mode setting blow dryers.
Now that your hair is a bit dry but still wet, separate hair into two sections on two sides viz. left and right. Now set the blow dryer to the lowest temperature and highest wind power setting.

Blow Dry Hair 2 Step 3:

Start blowing on each side from the bottom by holding hair dryer in such a position that the handle is downwards and the mouth faces upwards targeting the lower sections of locks.

Blow Dry Hair 3 Step 4:

When hair in the lower section feels a little dry, change the direction of the dryer so that its mouth is facing downwards. Start blowing from the top and slowly move to the lower sections. Do this on both the sides till you feel that the hair in the top section is completely dry.
Blow Dry Hair 4 Step 5:
If you just want a normal blowing for drying your hair, then you can follow increase the heat setting to level 2 or for faster drying and to level 3 if you are in a hurry. Follow this up with combing with your paddle brush or comb when hair is completely dry.

Blow Dry Hair 5 Step 6:

If you want bounce and added volume with a normal blow dry, then use the lowest temperature and highest wind power setting till step 4. Avoid using higher heat settings because we do not want your hair to dry completely. Comb your hair slightly as in step 5. Be very gentle as your under hair is still wet. Now take sections of hair from both the sides and clip them on the top leaving the rest below.
Blow Dry Hair 6 Step 7:
Now follow step 4 again holding blow dryer’s handle upwards and blowing downwards along the sections that are left loose and focus on blowing on the roots which are wet.
Change heat setting to medium and wind power to lowest or medium. Do not focus dryer on the roots for more than 30 seconds at each point. It can cause damage. Keep a minimum distance.
Blow Dry Hair 7 Step 8:
When hair at the roots feel dry, open the clip and throw your hair downwards over your head at the front.
Blow Dry Hair 8 Step 9:
Now blow dry your hair with the mouth of the dryer facing upwards and the handle downwards starting from below.
Blow Dry Hair 9 Step 10:
When hair feels a bit bouncy and flowy, shift your hair back and this should be enough to give you that bounce that you wanted.
Blow Dry Hair 10 Did you find this article helpful?  Do leave your precious comments below.